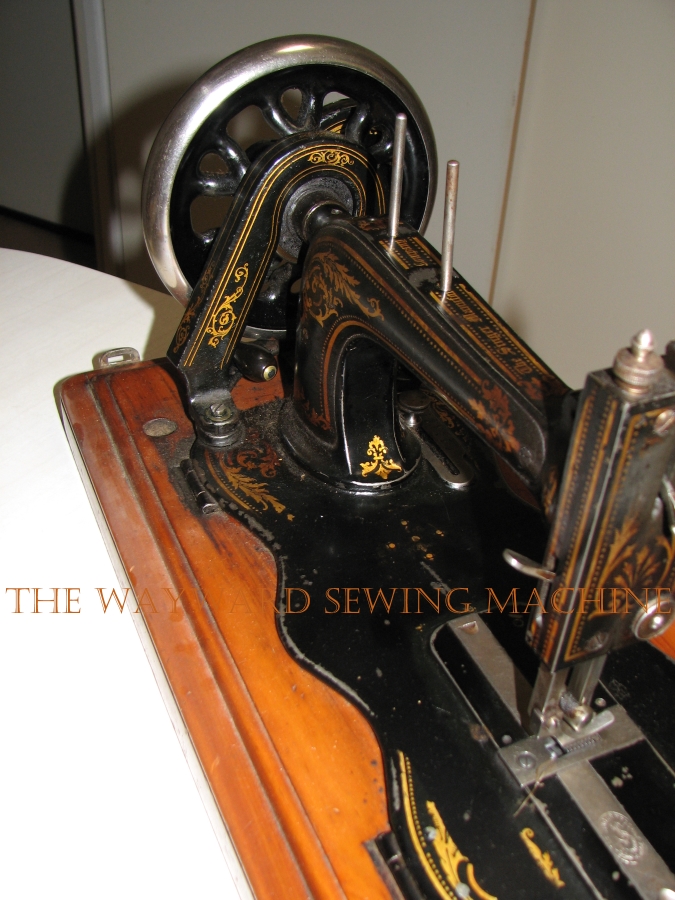
Recently I have acquired a number of new machines, including two vibrating shuttle machines. I decided to create a post detailing how to oil and clean one, particularly in the case of the machine being seized through being left to sit.
 |
| From the front |
The machine used below is called The Valley B.G. and is made in Germany. I suspect it could be a re-badged Vesta. It should be noted not all machines are identical although most parts operate in a fairly similar fashion. A White vibrating shuttle, for example, has a different mechanism for operating the shuttle movement. If the machine is seized, gently clean the oil holes to try an reduce the amount of dust likely to fall inside and apply oil to all oil holes on the arm of the machine, see below:
 |
| Oil holes on arm of machine |
There is another oil hole just out of frame which lubricates the main shaft as it leaves the head and is attached to the hand-wheel. This machine had no oil holes on the bed but some machines do, so check yours and oil if need be.
Now turn the machine on its back so that you can see underneath. Referring to the diagram below oil the machine, applying grease to the roller and its track (see close up below). Use all oil holes but if there doesn't seem to be one just drip or spray oil into the join between two moving parts as much as possible. The top left hand arrow in the picture which says 'grease' should actually say 'oil' instead. Using steel wool and oil, you can clean all the rods, being sure to remove any rust and wiping the parts clean with a rag afterwards.
 |
| Underneath of machine showing oiling and greasing |
 |
| Oil hole in shuttle mechanism |
 |
| Showing where to grease roller for shuttle mechanism |
Remove the back plate on the machine and thoroughly grease the cam and fork and the rocking mechanism, as indicated in the image below.
 |
| Showing greasing under back plate. |
Now remove the face-plate, needle, foot and throat plate. Take note of which way the needle was inserted and if in doubt about whether it is a standard size, hang on to it for later comparisons. If the machine is still seized and with the needle down, removing the needle may be impossible, in which case the throatplate will not come off either. However, if you have oiled the machine as above, some gentle force may help your cause. Sometimes you will have to repeat oil them and leave them to sit for a few days before they will yield.
 |
| Shows screws to remove throatplate, needle and foot |
Now turn your attention to under the faceplate (the metal cover that sits on your left if you are facing the machine). Underneath you will have the needlebar, presser bar, take-up lever and other delights which won't concern us yet. Clean the needle and presser bars well with oil and steel wool and then evenly oil so that they glide smoothly up and down.
 |
| Under the faceplate |
Both the take-up lever (seen above) and the needle bar are moved up and down by a cam stud roller following a cam. These rollers and cams need to be well greased so that the move freely without dragging. The rollers are supposed to rotate as they travel around the cam so they do not drag an wear it. This can be hard to test though, watching closely with a torch is your best bet. Below are close-up images showing these rollers and their cams in relation to the surrounding parts and showing where to grease.
 |
| Take-up lever operation from under face-plate |
 |
| Take-up lever roller and track from front |
 |
| Roller for moving needlebar up and down from under face-plate |
Now turn the machine upside down again and clean the arch of the shuttle's track well with steel wool and oil. Once clean, smear a film of grease across it using your finger. This is to lubricate the shuttle as it runs across.
 |
| Shuttle track, clean and grease. |
 |
| Shows shuttle sitting on its track |
Now dismantle the tension assembly carefully. Remove the thumbnut all the way and then carefully take the pieces off, laying them in order so that you know how to replace them. Leave the take-up spring on the shaft and clean the threads with a soft wire brush and some oil. Clean the tension discs well so that they don't snag thread and ensure the tension spring is put back on with the final loop facing downwards.
 |
| After removal of tension assembly |
 |
| Parts of tension assembly in order of reassembly |
 |
| Showing correct placement of tension spring |
Now turn your attention to the shuttle. You should remove the tension spring and clean it well with steel wool and oil and clean the shuttle thoroughly in the same way. Tension on the thread is adjusted using the screw you remove to take out the spring.
 |
| Removing tension spring |
 |
| Tension spring and screw, before cleaning |
 |
| Showing lint under spring which will interfere with tension regulation |
Once reassembled, grease flat edges of shuttle lightly.
 |
| Where to grease shuttle |
Now you can thread the shuttle with a long bobbin. Using two hands, hold the shuttle in one ( the left if you are right-handed) and the bobbin in the other, so that the bobbin thread is across the bobbin and the end is on the right, as below but I only had one hand spare!
 |
| Showing bobbin thread direction and cut in shuttle. |
Now drop the bobbin into the shuttle, dragging the thread down the cut in the side until it reaches the end and moves up the other side.
 |
| Thread at end of cut |
Now pull the thread to the left until it goes under the finger on the tension spring.
 |
| Showing thread under finger |
Bring thread back to the right over the finger and your shuttle is ready to go into the machine.
 |
| Finished threading |
To insert the shuttle into the machine, place it point first into the shuttle carrier and drop the other end gently guiding it to sit straight and evenly into it, as below:
 |
| Inserting the shuttle |
Hopefully the above can serve as a starting point to anyone wishing to work on a vibrating shuttle sewing machine. Any questions feel free to contact me and I will do my best to help.